
Touchscreen warning messages
Sections:
About Warning Messages
Warning messages are to help you diagnose an issue with your roaster. See below to learn why the different warning messages appear.
Hatch Open
This message is connected to the inductive sensor related to the drop handle door. It tells you that the drop handle is in the upward position. The message will show up when the drop handle is moved away from the inductive sensor (the sensor detects movement in front of it when the drop door is closed).
Something could be wrong if:
You still get this message when moving the drop handle to the downward position; your proximity sensor could be broken. The result is the roaster not heating up.
How to determine if a proximity sensor is broken:
Remove the top plate so you can see the sensors.
Move the drop or charge handle to see if a red light flashes on the sensor. If it does, it works.
If there is a red light flashing constantly, the sensor is broken.
If there is no red light, try to move the proximity sensor closer to the drop or charge handle using a 12-millimeters spanner.
Check the connection on the PCB, ensuring that the cable hasn’t been pulled off or isn’t properly plugged in.
Check that the proximity sensors for the drop and charge handle haven’t been swapped.
If none of the above fixes it, your proximity sensor is broken. Buy a new one or contact support if your machine is still under warranty.
Charge Handle Open
This message shows up when the charge handle is lifted (hence, movement is detected in front of the proximity sensor).
Something could be wrong if:
You get this warning message without lifting the charge handle/with the charge handle in the resting position.
The roasting process does not start when lifting the charge handle (and no warning message appears).
The proximity sensor could be faulty (sometimes malfunctioning due to too much heat), or the two proximity sensors for the drop and charge handle have been switched around. If the proximity sensor is broken, tapping charge in the top left corner can start the roasting process instead.
How to determine if a proximity sensor is broken:
Remove the top plate so you can see the sensors.
Move the drop or charge handle to see if a red light flashes on the sensor. If it does, it works.
If there is a red light flashing constantly, the sensor is broken.
If there is no red light, try to move the proximity sensor closer to the drop or charge handle using a 12-millimeters spanner.
Check the connection on the PCB, ensuring that the cable hasn’t been pulled off or isn’t properly plugged in.
Check that the proximity sensors for the drop and charge handle haven’t been swapped.
If none of the above fixes it, your proximity sensor is broken. Buy a new one or contact support if your machine is still under warranty.
Bean Dropper Error
This error appears when the machine tries to open the drop door, but the sensor can not detect that the door has opened.
Most commonly this means that the proximity sensor is not working properly, and needs to be adjusted or replaced, by following this guide. If the error was caused by a sensor issue, then the drop door will still open and release the beans.
If the drop door does not open, then the problem is the drop door motor. Contact support for help.
Chassis Fan Failure
Related to the chassis fan behind the mesh grid at the back of the roaster. This is cooling the electronics of the roaster. If you get this message, first check your chassis fan settings. The warning message will appear when the fan’s speed is detected to be under 2000 RPM, so check to see if the ventilation fan (RPM) settings in the service menu have been lowered somehow. If not, you need to remove the top plate and check the following:
Connection from cable to PCB. Is the cable properly attached to the PCB? Check that all three pegs are correctly in. Use this photo for reference.
Turn off your roaster and inspect the extension cable connection. Is the extension cable properly connected to the fan cable? This can loosen over time; make sure the cable is firmly connected, and all pegs are correctly attached. Remove the extension cable and insert it again.
Check that the fan is running. It is easiest to see if you turn the roaster on and off. You can see it from above, looking inside the roaster or through the fan gritter at the back.
Troubleshoot a potentially broken fan:
Enter the service menu and tap “Debug hardware.”
Check the RPM value reading from “Chassis fan measured RPM.”
If there is a problem with the fan, the value would be NaN or 0. The normal condition would be around 2500.
If both the chassis and heater fan are displayed as NaN or 0, please contact Support, as this may indicate that you need a new fan chip on your PCB.
If the chassis fan is displayed as NaN/zero, but the heater fan is normal (around 3500 RPM), the next step is to determine if a problem with the fan causes this. Please turn off the roaster, unplug the power cord, and remove the top plate. Take off both the heater and chassis fan connectors from the PCB. Attach the chassis fan connector on the heater fan slot and the heater fan connector on the chassis fan slot.
Put the top plate on again (no need to fasten it yet), plug in the power cord, and turn the machine back on. Reenter the service menu and the debug area.
If there is a problem with the chassis fan: the heater fan should now display NaN/0. You need to order a new Chassis fan and replace it if it does.
If the values on the Debug area remain the same (the chassis fan is NaN/zero, and the heater fan displays typical values), there is something wrong with the chip on your PCB. Contact Support with the following message: The chassis fan is shown as NaN/zero in the Service menu. Changing the fan setup (chassis fan connector on heating fan chip and vice versa) does not change the readout, and a replacement PCB or repair of the PCB is required.
Heater Fan Failure
Related to the heater fan on the right-hand side of the roaster. The warning message shows up if the speed drops below 3000 RPM, so check your settings to see that it hasn't been lowered somehow. If the settings are ok, you need to remove the top plate and check the following:
Check the cable connection on the PCB. Is the cable properly connected, with all pegs fi rmly attached in the holes?
Troubleshoot a potentially broken fan:
Enter the service menu and tap “Debug hardware.”
Check the RPM value reading from “Heater fan measured RPM.”
If there is a problem with the fan, the value would be NaN or 0. The normal condition would be around 3400.
If both the chassis and heater fan are displayed as NaN or 0, please contact Support, as this may indicate that you need a new fan chip on your PCB.
If the heater fan is displayed as NaN/zero, but the chassis fan is normal (around 2500 RPM), the next step is to determine if a problem with the fan causes this. Please turn off the roaster, unplug the power cord, and remove the top plate. Take off both the heater and chassis fan connectors from the PCB. Attach the chassis fan connector on the heater fan slot and the heater fan connector on the chassis fan slot.
Put the top plate on again (no need to fasten it yet), plug in the power cord, and turn the machine back on. Reenter the service menu and the debug area.
If there is a problem with the heater fan: the chassis fan should now display NaN/0. You need to order a new heater fan and replace it if it does.
If the values on the Debug area remain the same (the heater fan is NaN/zero, and the chassis fan displays typical values), there is something wrong with the chip on your PCB. Contact Support with the following message: The heater fan is shown as NaN/zero in the Service menu. Changing the fan setup (chassis fan connector on heating fan chip and vice versa) does not change the readout, and a replacement PCB or repair of the PCB is required.
Exhaust fan failure
This warning message is triggered if the exhaust fan’s motor stops spinning. If you get this message, check the following:
Cool down the roaster completely, and remove the ventilation hose from the back so you can see into the exhaust ventilation exit. You should be able to see the impellers from there. Turn the roaster on and off to see if the impellers are spinning around. The warning message is related to the impellers on the left-hand side. The right-hand side impellers will affect bean cooling but have no warning message on-screen.
Contact support to get a new motor if your impellers are not spinning.
Motor is Stuck
This warning message is related to the inductive sensor monitoring the chamber motor rotation. The message is triggered if the proximity sensor detects that rotation is too slow according to a calculation based on the expected speed of the motor and the motor gear ratio.
First, check your motor gear ratio settings in the service menu; it should say 12:1 unless you have an older machine (p16_30 and earlier models). If you have an older model, check your correct setting here.
- If your drum moves back and forth, the proximity sensor is most likely placed too far away from the RPM plate and needs to be adjusted. You can use this guide for reference, but move it closer to the RPM plate instead of changing the sensor.
Please also check out our troubleshooting guide for motor/paddle issues.
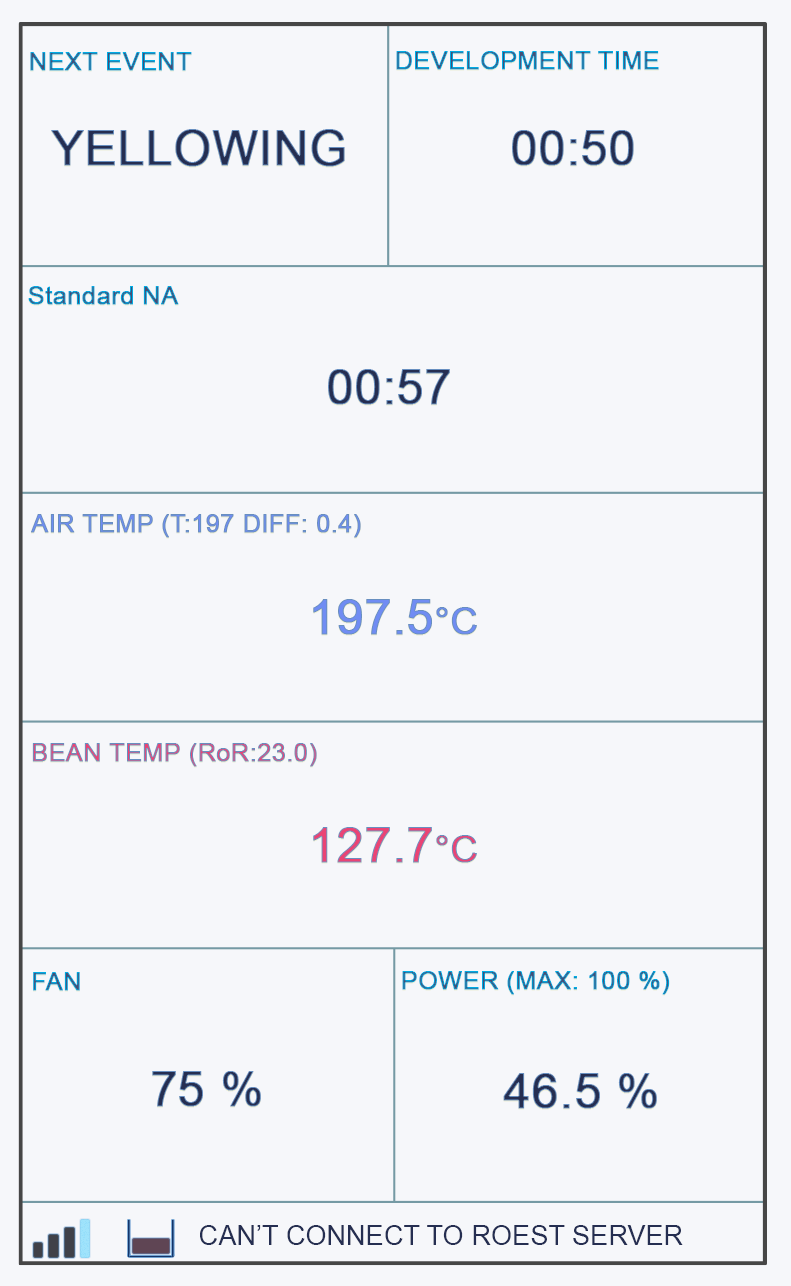
Can’t connect to the ROEST server
This warning message is triggered if the machine is unable to connect to the MQTT server (roest server). This can happen if the wifi network of the machine has a bad internet connection or our server is down. Most of the time, it is not related to anything wrong with the device.
Max Temperature Reached
This warning message is triggered if the ET sensor reads a temperature of 320 degrees or more.
Machine is too hot! Restart!
This message is triggered by the PCB becoming too hot (if the temperature sensor on the PCB reports 65 degrees or more). Reasons:
The chassis fan gitter needs to be cleaned. If too much dirt and grit have been collected in the fan gitter, the chassis fan won't be able to do its job correctly. Make sure to clean the fan gitter regularly.
Warning message combined with chassis fan error: Go back to the checkpoint for the chassis fan warning message.
Remove the top plate and check the orange hose from the chamber to the back of the roaster to see if it is damaged or not correctly attached to both ends (perhaps leaking heat somewhere?).
Fan Error Detected! Restart!
This message will be triggered along with chassis fan failure, heater fan failure, and exhaust fan failure warning messages.
No server connection
When you get this message on the screen the roaster is still connected to your wifi but the connection to the internet / our server is disrupted. If the roaster manages to connect within 60 seconds then this message will disappear - if it takes longer then the message will stay active to notify you. As long as the roaster manages to connect within 2 minutes then the log will be updated. If this message often appears then your wifi connection is bad or the internet connection is unstable.
Warning WiFi connection lost.
When you get this message on the screen, the roaster has lost the internet connection (or has spent more than 10 seconds trying to connect during startup. If the roaster manages to connect within 60 seconds, this message will disappear - if it takes longer, it will stay active to notify you. You can then see if the wifi symbol is stable at the lower left corner. As long as the roaster connects within 2 minutes, the log will be updated. If this message often appears, then your wifi connection is bad, or the internet connection is unstable.