
Web portal
Login
After ordering the ROEST sample roaster, you will receive an email with your username and password to login into the Web Portal.
WEB PORTAL ADDRESS
Visit front.roestcoffee.com and insert your credentials to log in.
After logging in, you will access the home page with the listed roaster.

One user can have one or more roasters assigned to their account.
ONE USER - ONE ROASTER
After logging into the portal, a front page with the ROEST machine assigned to your user will appear.
All roasters are listed with a unique name (named after places in Norway) and production number. See the image below.
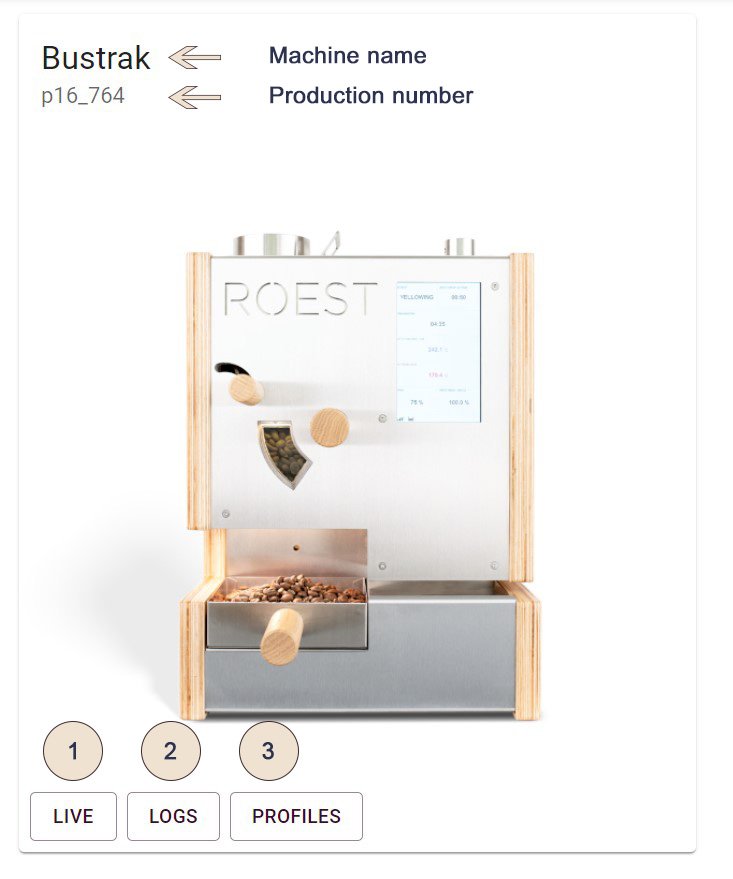
The front page is divided into three key features:
1. Live: Shows a live view of your roasting session.
2. Logs: This allows backtracking of roasting logs.
3. Profiles: This allows the creation and editing of profiles in your library.
ONE USER - MULTIPLE ROASTERS
All roasters assigned will be shown once you log into the Web Portal. See the image below.

You can easily switch between your roasters by using the drop-down menu.

Live view
Here you can monitor the roasting process.


If you hold your cursor over the graph, you see detailed information about the roast at that time.
Logs
All valid logs are stored in a list in the cloud.
(Invalid log = log missing YELLOWING or DROP event)
Logs are listed after roasting dates (newest first).
To view a specific log, click on the batch number.
Search for a specific log.
Select logs to compare by clicking on this symbol.
After selecting the logs you want to compare, click here.

LOG PREVIEW
Once you click on the batch number, your log will be shown in a new window. See the image below.

Hovering the cursor over the graph shows a breakdown of all values at that specific time.
Edit the name of the batch.
Compare your graph to the profile target(s).
Download as a CSV file to import for further use.
Download as a pdf file to import for further use.
Switch to fullscreen view.
Delete the current log.
Create a new profile from this log. Note:
Power profiles can only be created from other power profile logs.
Hybrid profiles cannot be created from a log.
Air and bean temperature profiles can be created from all logs.
Add comments and roasting notes to your log.
Legend of the roasting graph. Click on the individual parameters to disable or enable.
COMPARE LOGS
Clicking on Compare Logs opens up a list of other logs you can choose from to compare:

Your chosen logs. You can compare as many logs as you wish.
Toggle between your list of logs and the compare section.
Hover your cursor over the graph to see detailed information about your chosen parameters.
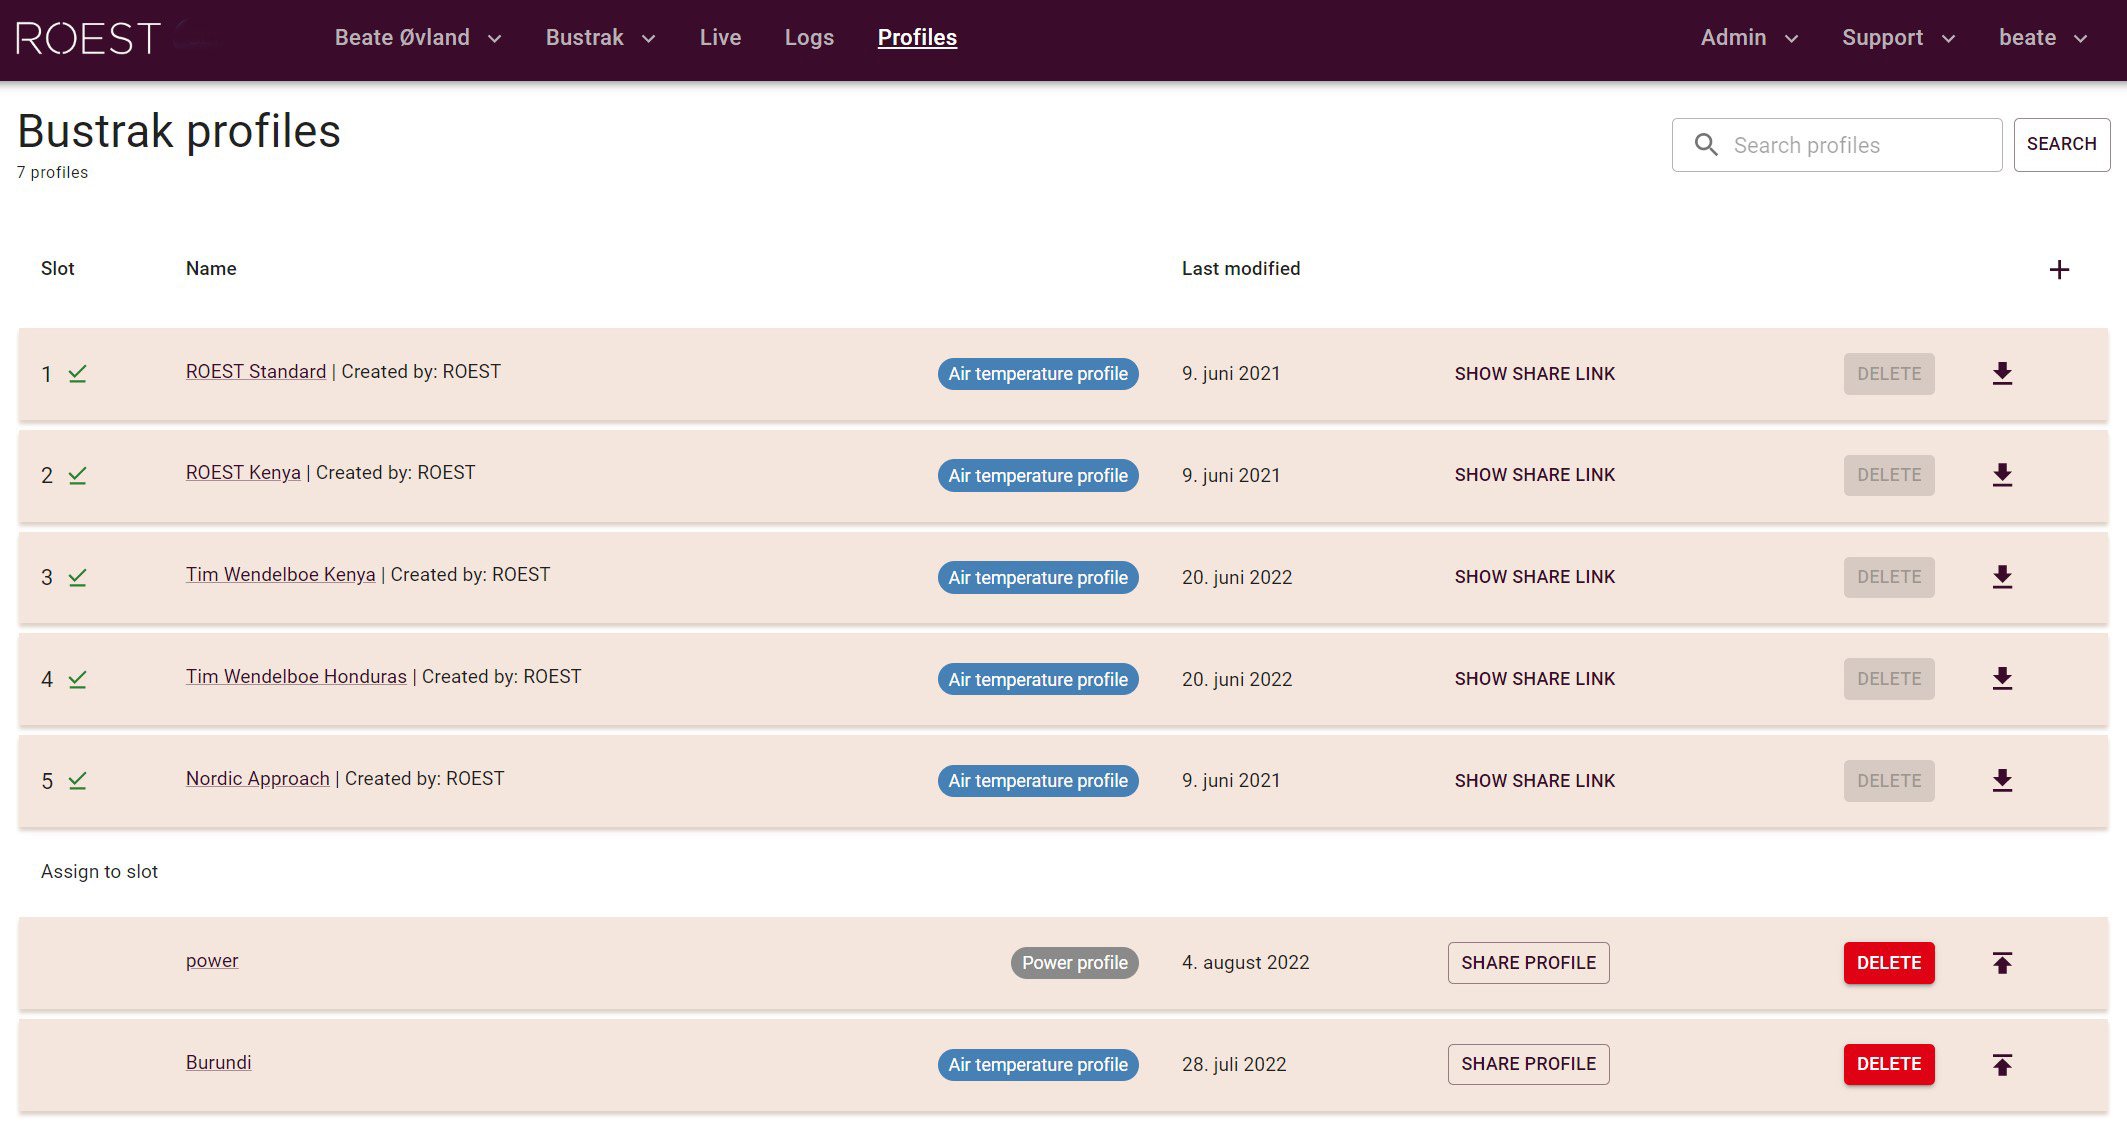
Profiles
Your library of profiles. Your ROEST machine can store five profiles in its memory, which you add and remove on this screen.
Settings
You can access settings by clicking on the user name in the main top bar.


