
How to create a profile
Instructions
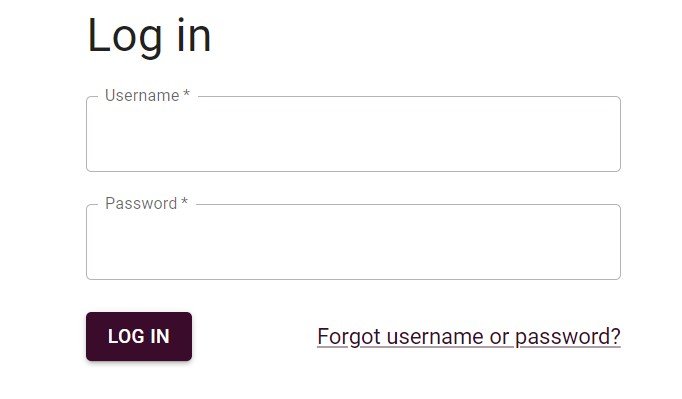
1. Login into the Web Portal with your username and password. After ordering the ROEST sample roaster, you will receive an email with your username and password.
2. Click on “Profiles” located on the main menu, under the picture of your roaster.

3. Click on the “+” sign on the right, next to the search box.


4. Choose a profile type from the menu that appears.
Which types of profile are available depends on which model of machine you have.
4. You will land on the page shown below.

A. Give your profile a name.
B. You can set a preheat temperature if you wish. If none is given, it will preheat to the temperature of the first point in your profile. If roasting with a power profile, it will preheat to the chosen waiting temperature (found in roasting settings) if not given a preheat temperature.
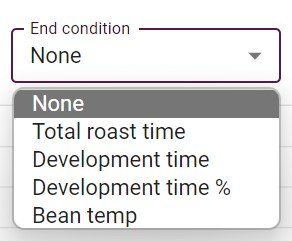
C. You can choose from four different end conditions. Development time and bean temp can also be changed on-screen during roasting, but total roast time cannot.
D. You can add extra information about the profile (called ‘metadata’) if you wish.
You can also load a previous profile or roast curve to load in the background as a reference when designing your profile. Click on ‘Compare Profile’ and you will be given the option to load a profile or roast batch as your reference.
E. You can edit multiple parameters in each profile. Switch between parameters with this drop-down menu.

How to create a curve

Example of creating an Air Temperature profile and plotting its curve
1. Choose the parameter you want to edit by choosing from the list or clicking on the line you want to edit. You’ll be starting with two points already; a starting point and an ending point. Both of these can be edited but not deleted.
2. To add a point, tap “ADD POINT”.
3. Adjust the time and the corresponding unit of your chosen parameter and tap OK.

SHORTCUT:
Add a point by double-clicking directly on the line.
Then edit the point by clicking and dragging the point to the desired position, directly on the graph.
4. Continue adding points. The curve will be shaped based on your added points.
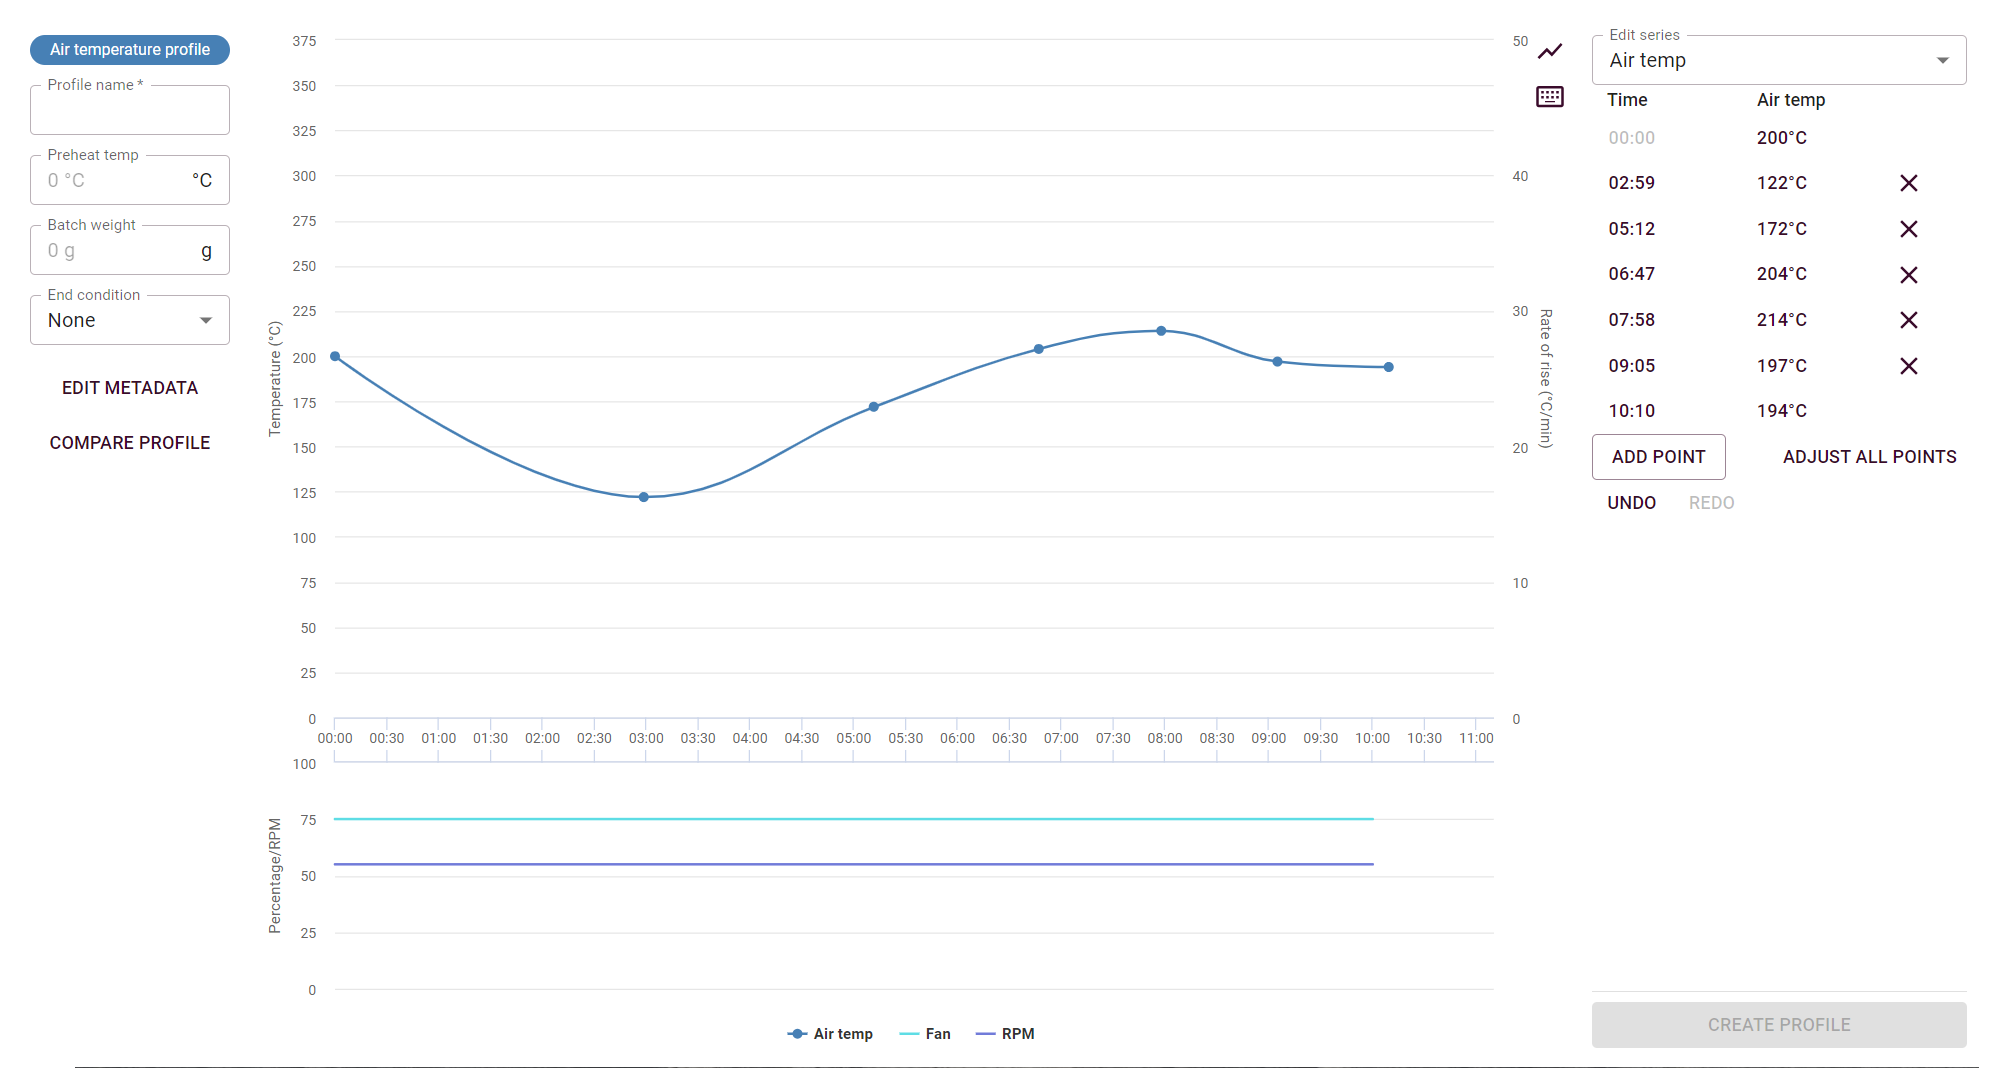
5. Continue adding points for all parameters.
6. Before you can save, remember to give your profile a name.
If you want the created profile to be downloaded to a roaster, read this guide.