
How to change: Impellers
How to change and clean the impellers on your ROEST.

Where to buy new impellers?
New impellers are only necessary if you have the older version and wish to upgrade or if they are broken. If your impellers are not spinning, the motor needs to be changed, not the impellers. Contact our Support Team in this case or go to our e-shop to buy new ones (one for each side). If you wish to buy new impellers, go here:
Before you start
⚠️DISCLAIMER
Information in this document is believed to be accurate and reliable. However, the manufacturer does not give any representations or warranties, expressed or implied, as to the accuracy or completeness of such information and shall have no liability for the consequences of the use of such information. The manufacturer is not liable or responsible for any problems arising from the attempted repair. The manufacturer reserves the right to make changes to information published in this document, including without limitation specifications and product descriptions, at any time and without notice. The manufacturer's products are not designed, authorized, or warranted to be suitable for use in applications where failure or malfunction can reasonably be expected to result in personal injury, death, or severe property or environmental damage. The manufacturer accepts no liability for inclusion and/or use of its products in such equipment or applications and therefore such inclusion and/or use is for the customer’s own risk.
⚠️SAFETY INSTRUCTIONS
make sure the roaster is turned off
the power cord has to be unplugged
follow the steps as instructed below
Tools

2.5-millimeters, 3-millimeters, and 4-millimeters hexagonal key.

Cutters.

Philips screwdriver

Flat ended screwdriver
You will also need a 1-millimeter spacer (can be anything, a piece of paper or similar).
Parts
The set consists of a left impeller and a right impeller. They are specific to their side. Our team should mark the impellers before shipping them so you can know their differences.
Instructions
Before starting - remove the top plate and both side panels.
Removing the chaff separator

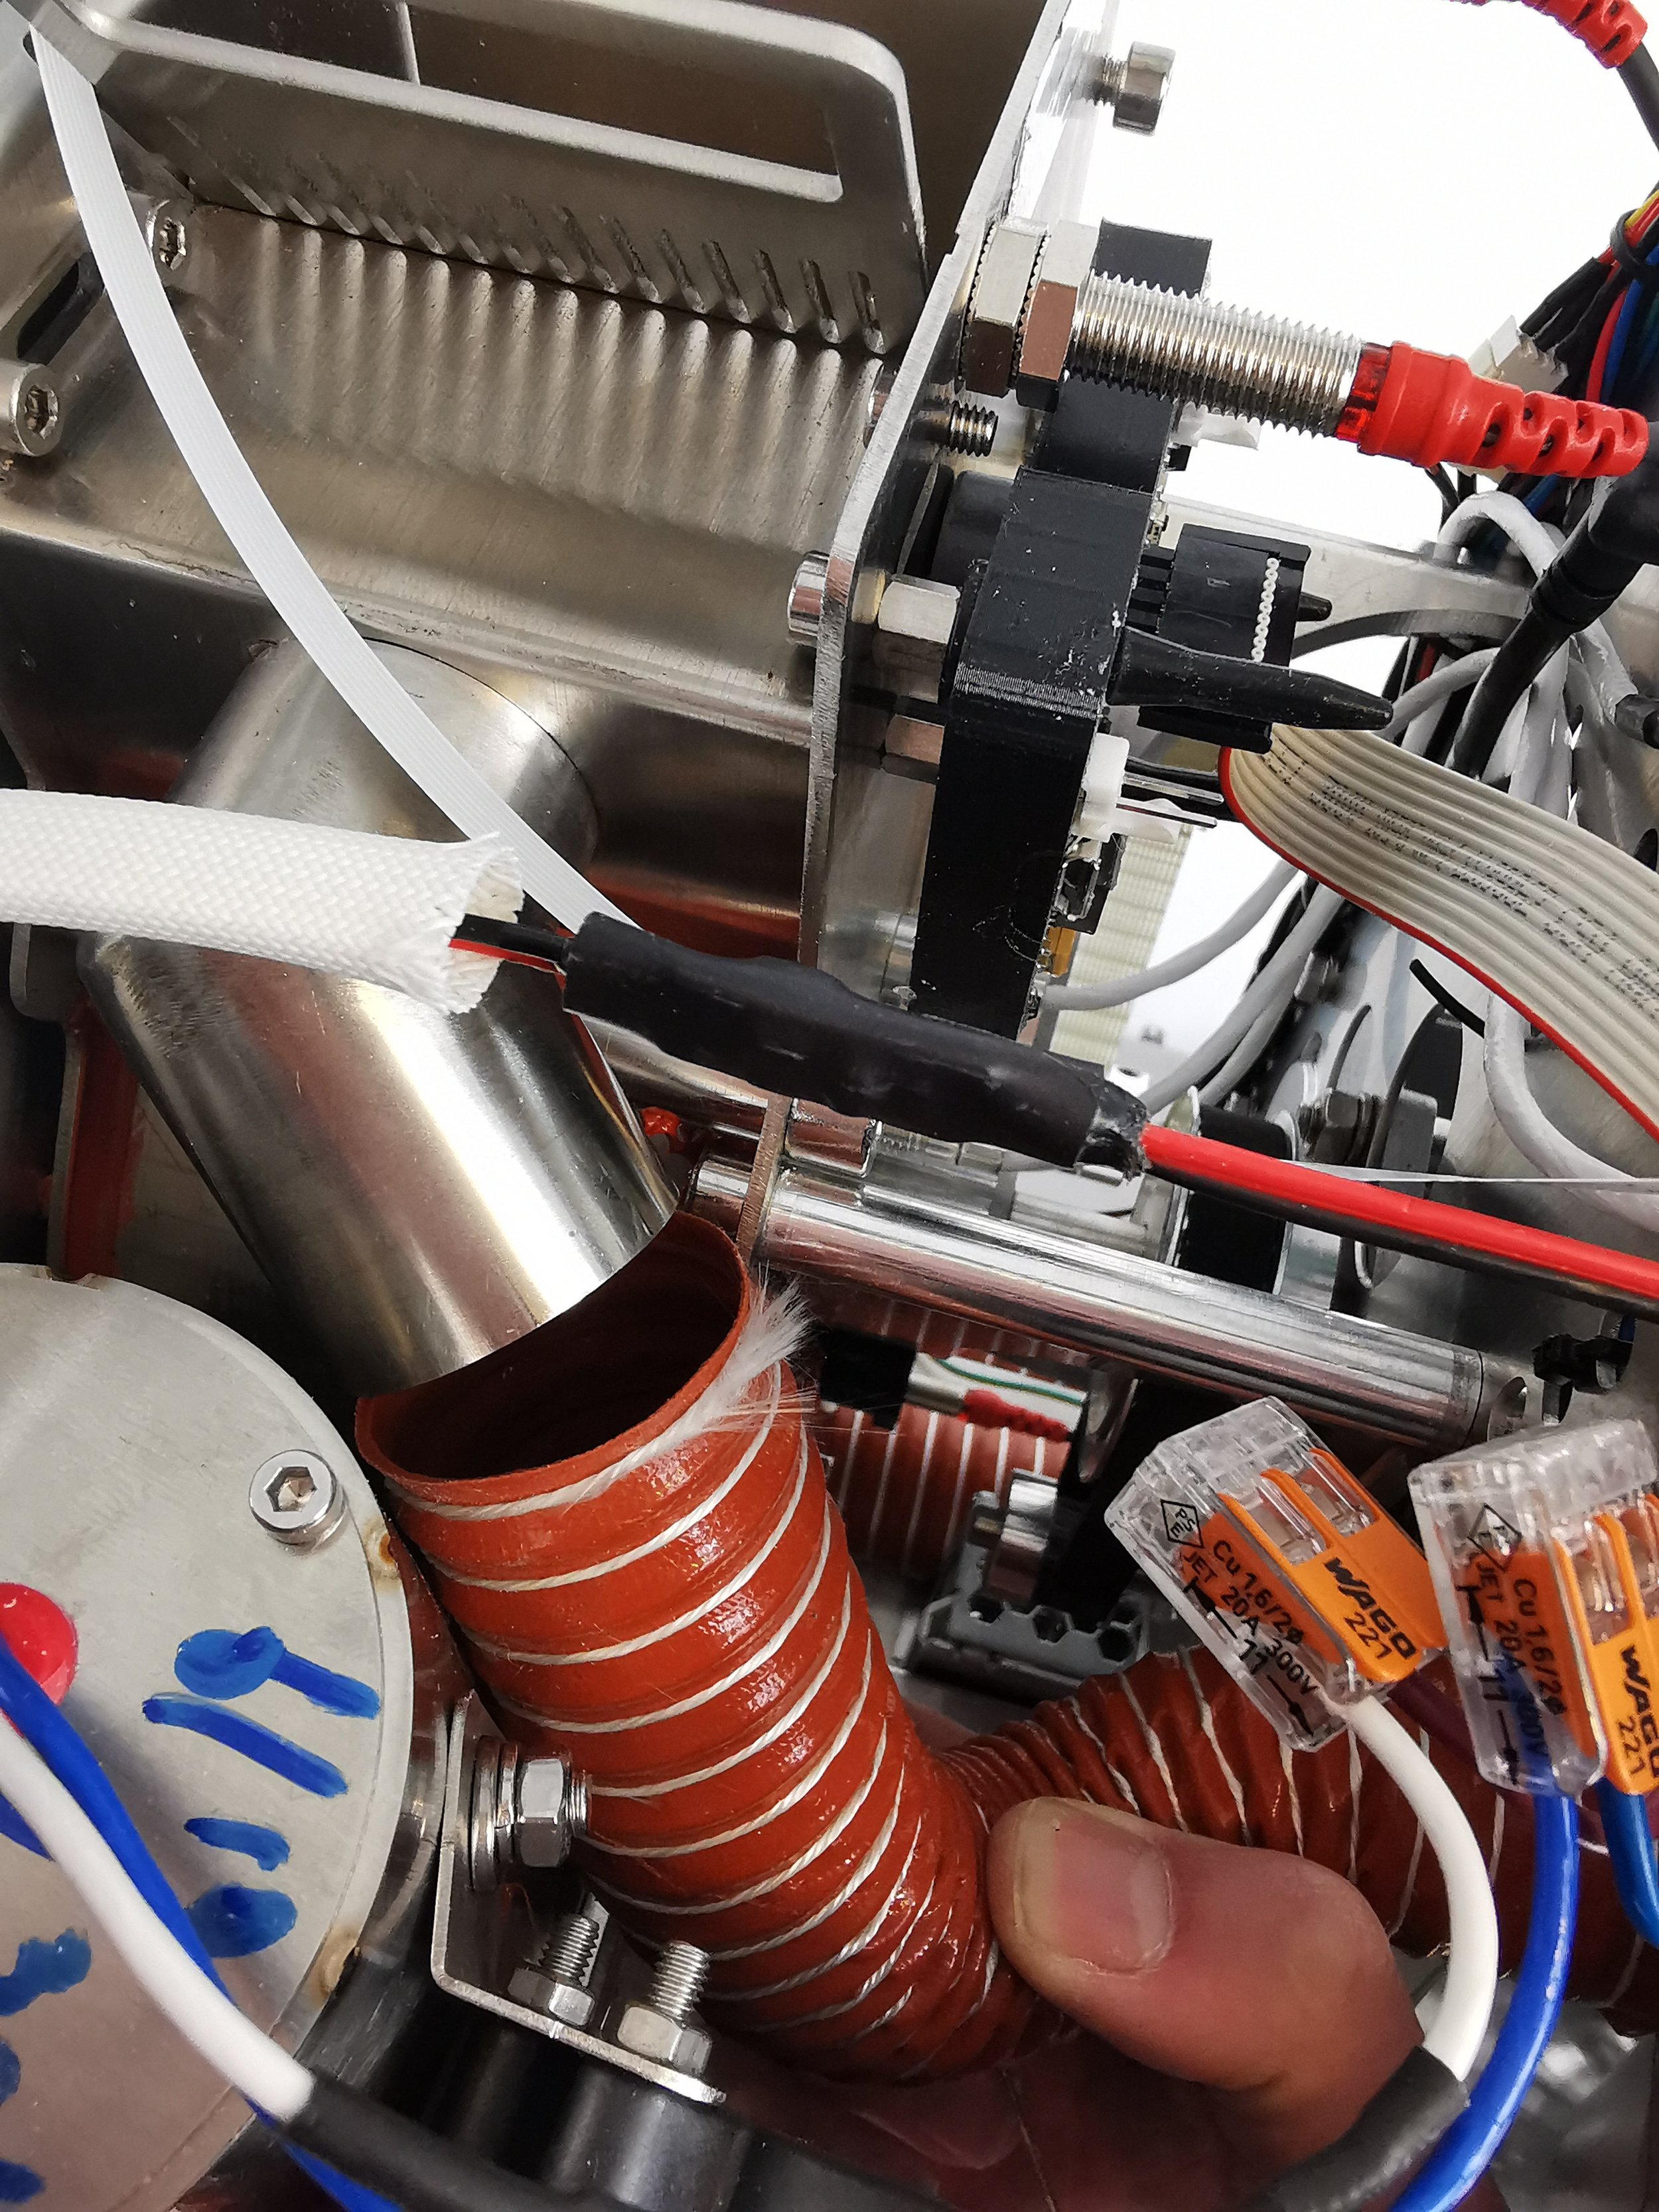
1. Orientate the roaster with the exhaust duct facing the operator.
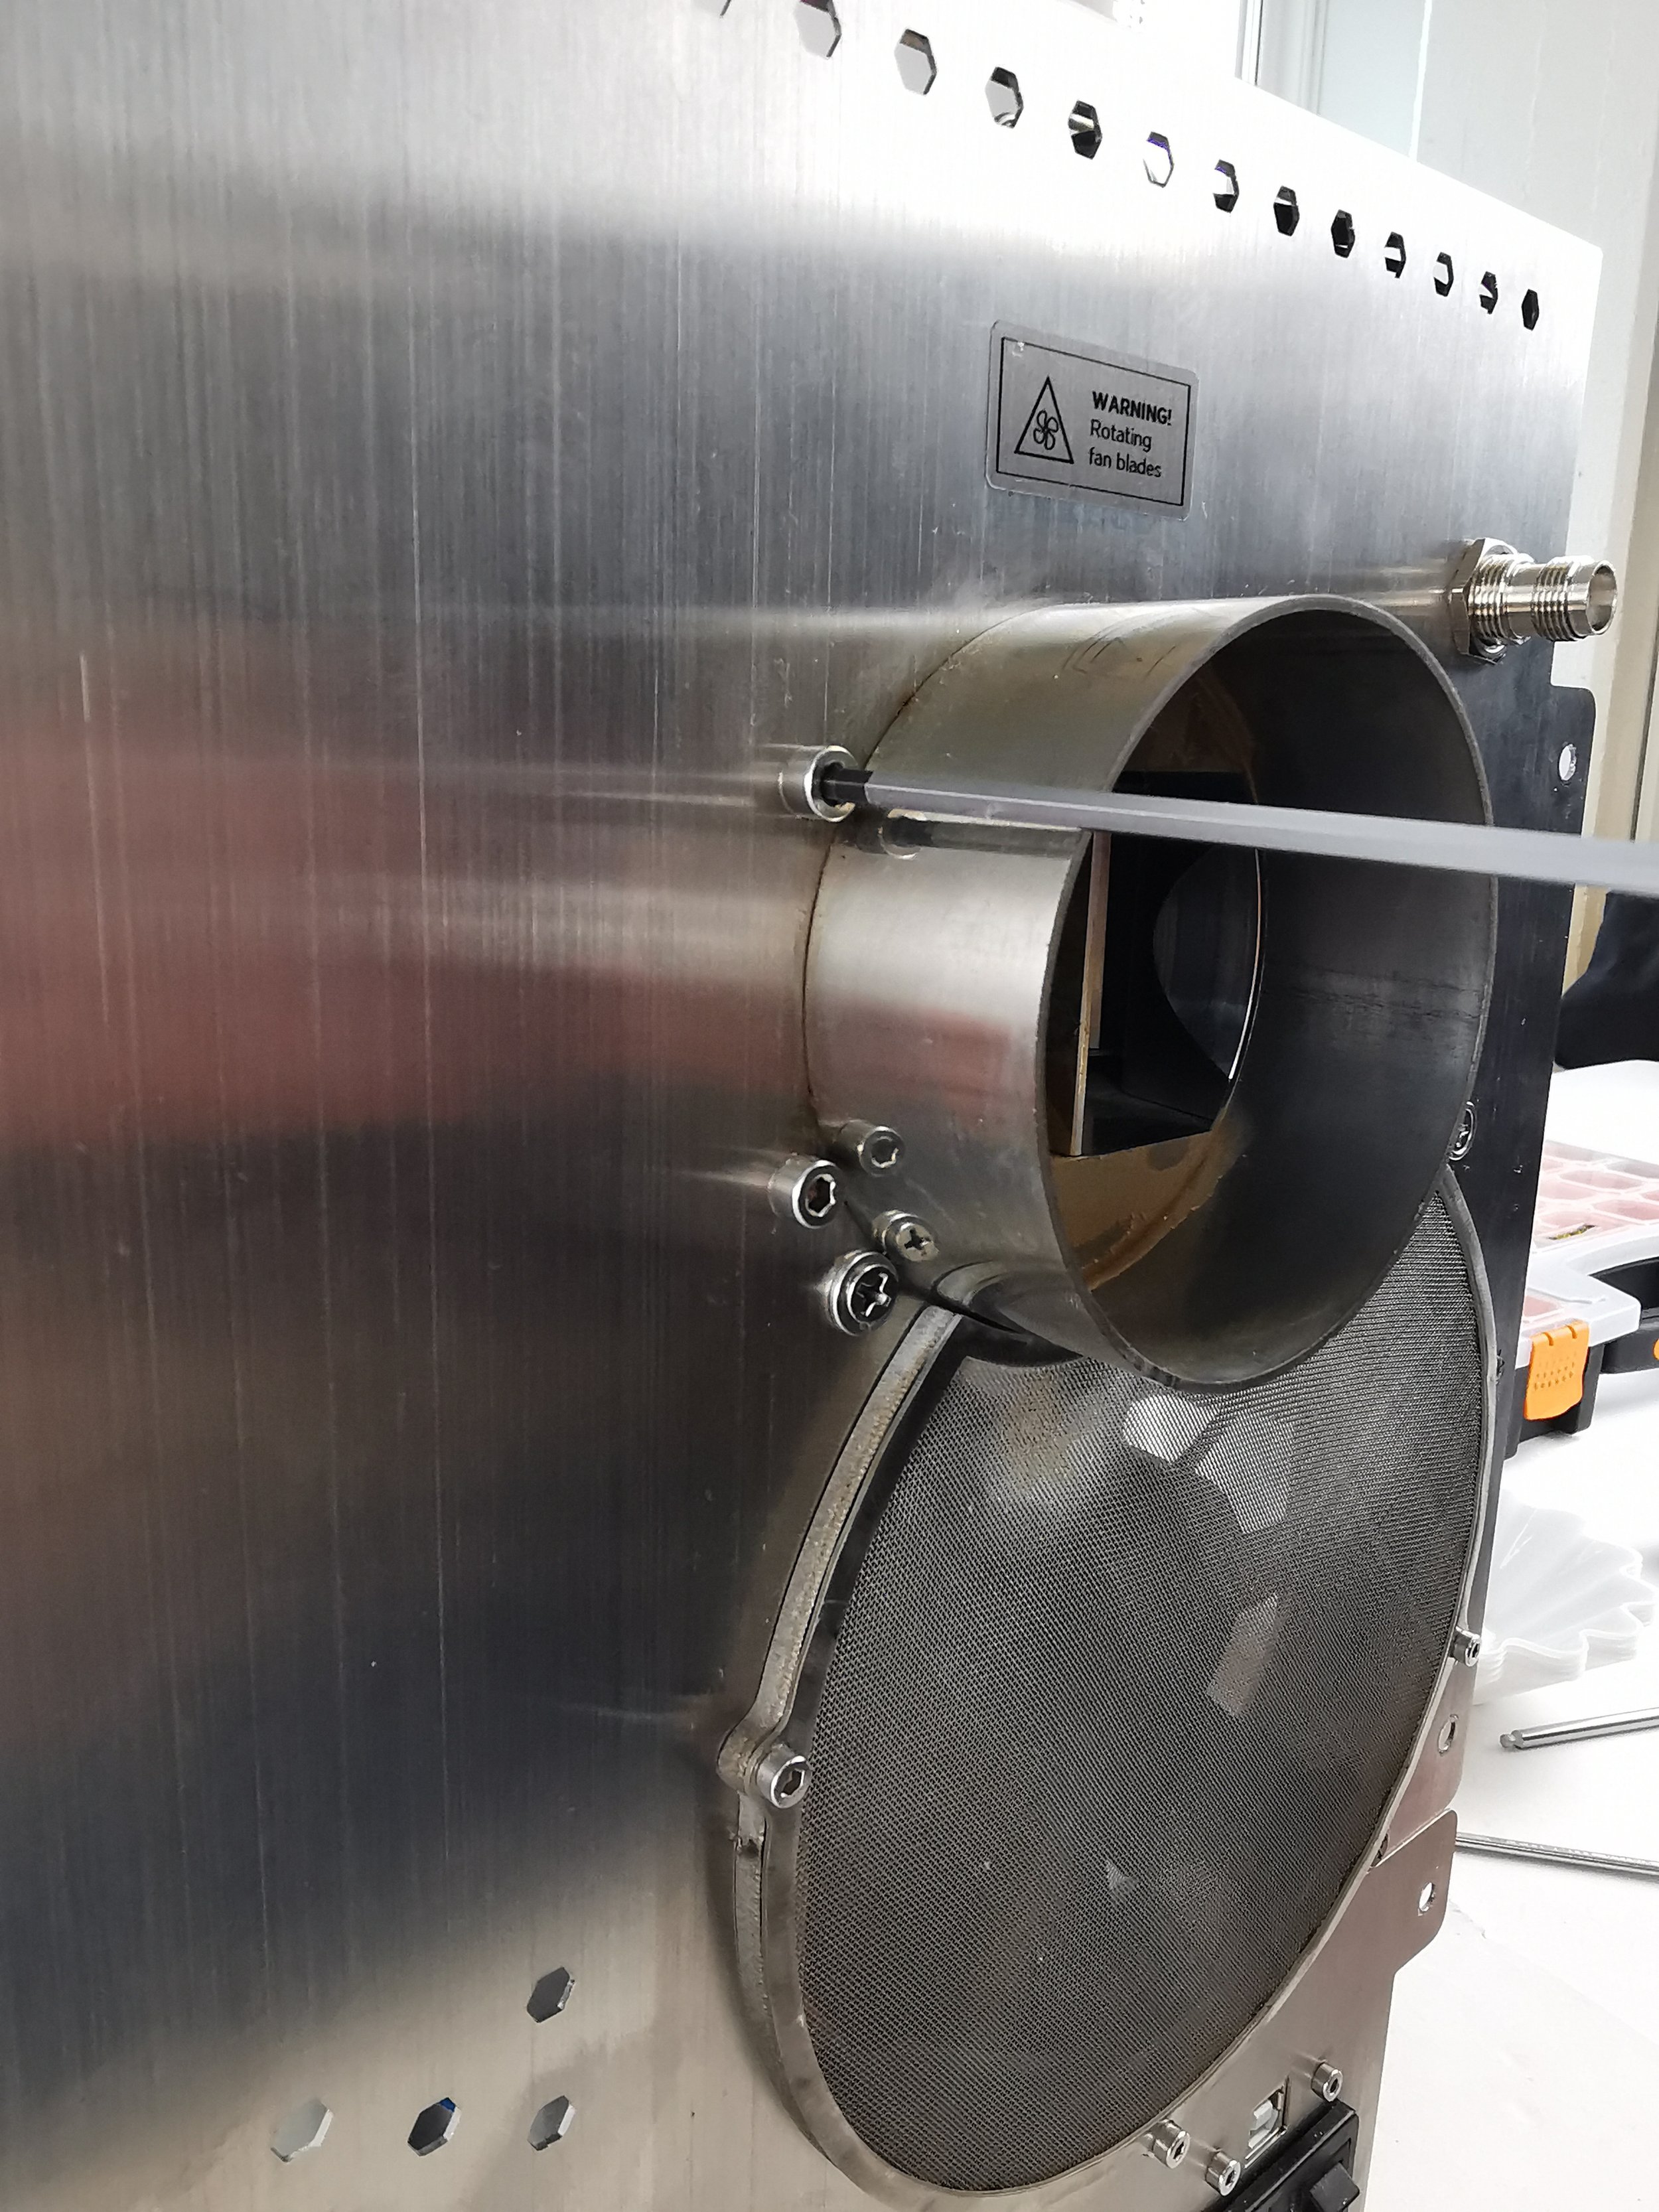
2. Remove four off M4 x 6 cap head screws around the exhaust duct holding the chaff separator.

3. Disconnect the tube from the chaff separator and exhaust duct from the bean stopper.

4. Disconnect the tube from the chaff separator and exhaust duct from the bean stopper.

5. Disconnect fan connectors from PCB marked 1, 3, and 4 in blue and 1 in yellow.

6. Disconnect the tube from the chaff separator and exhaust duct from the bean stopper.

7. Remove one off M3 x 6 cap head screw from the mesh to separate the back panel from the chassis.

9. The chaff separator is now free and can be removed from the inside of the roaster.

8. Unscrew three off M5 x 8 screws from the chaff drawer. NB: ensure that the split washers on the M5 x 8 screws are kept on the screws. The screw on the innermost side doesn’t need to be fully removed, only loosened enough to allow the chaff separator to slide out.
Removing the impellers

1. Place the chaff separator with the brushless motors facing the desk.

2. Unscrew ten off M4 x 6 cap head screws.
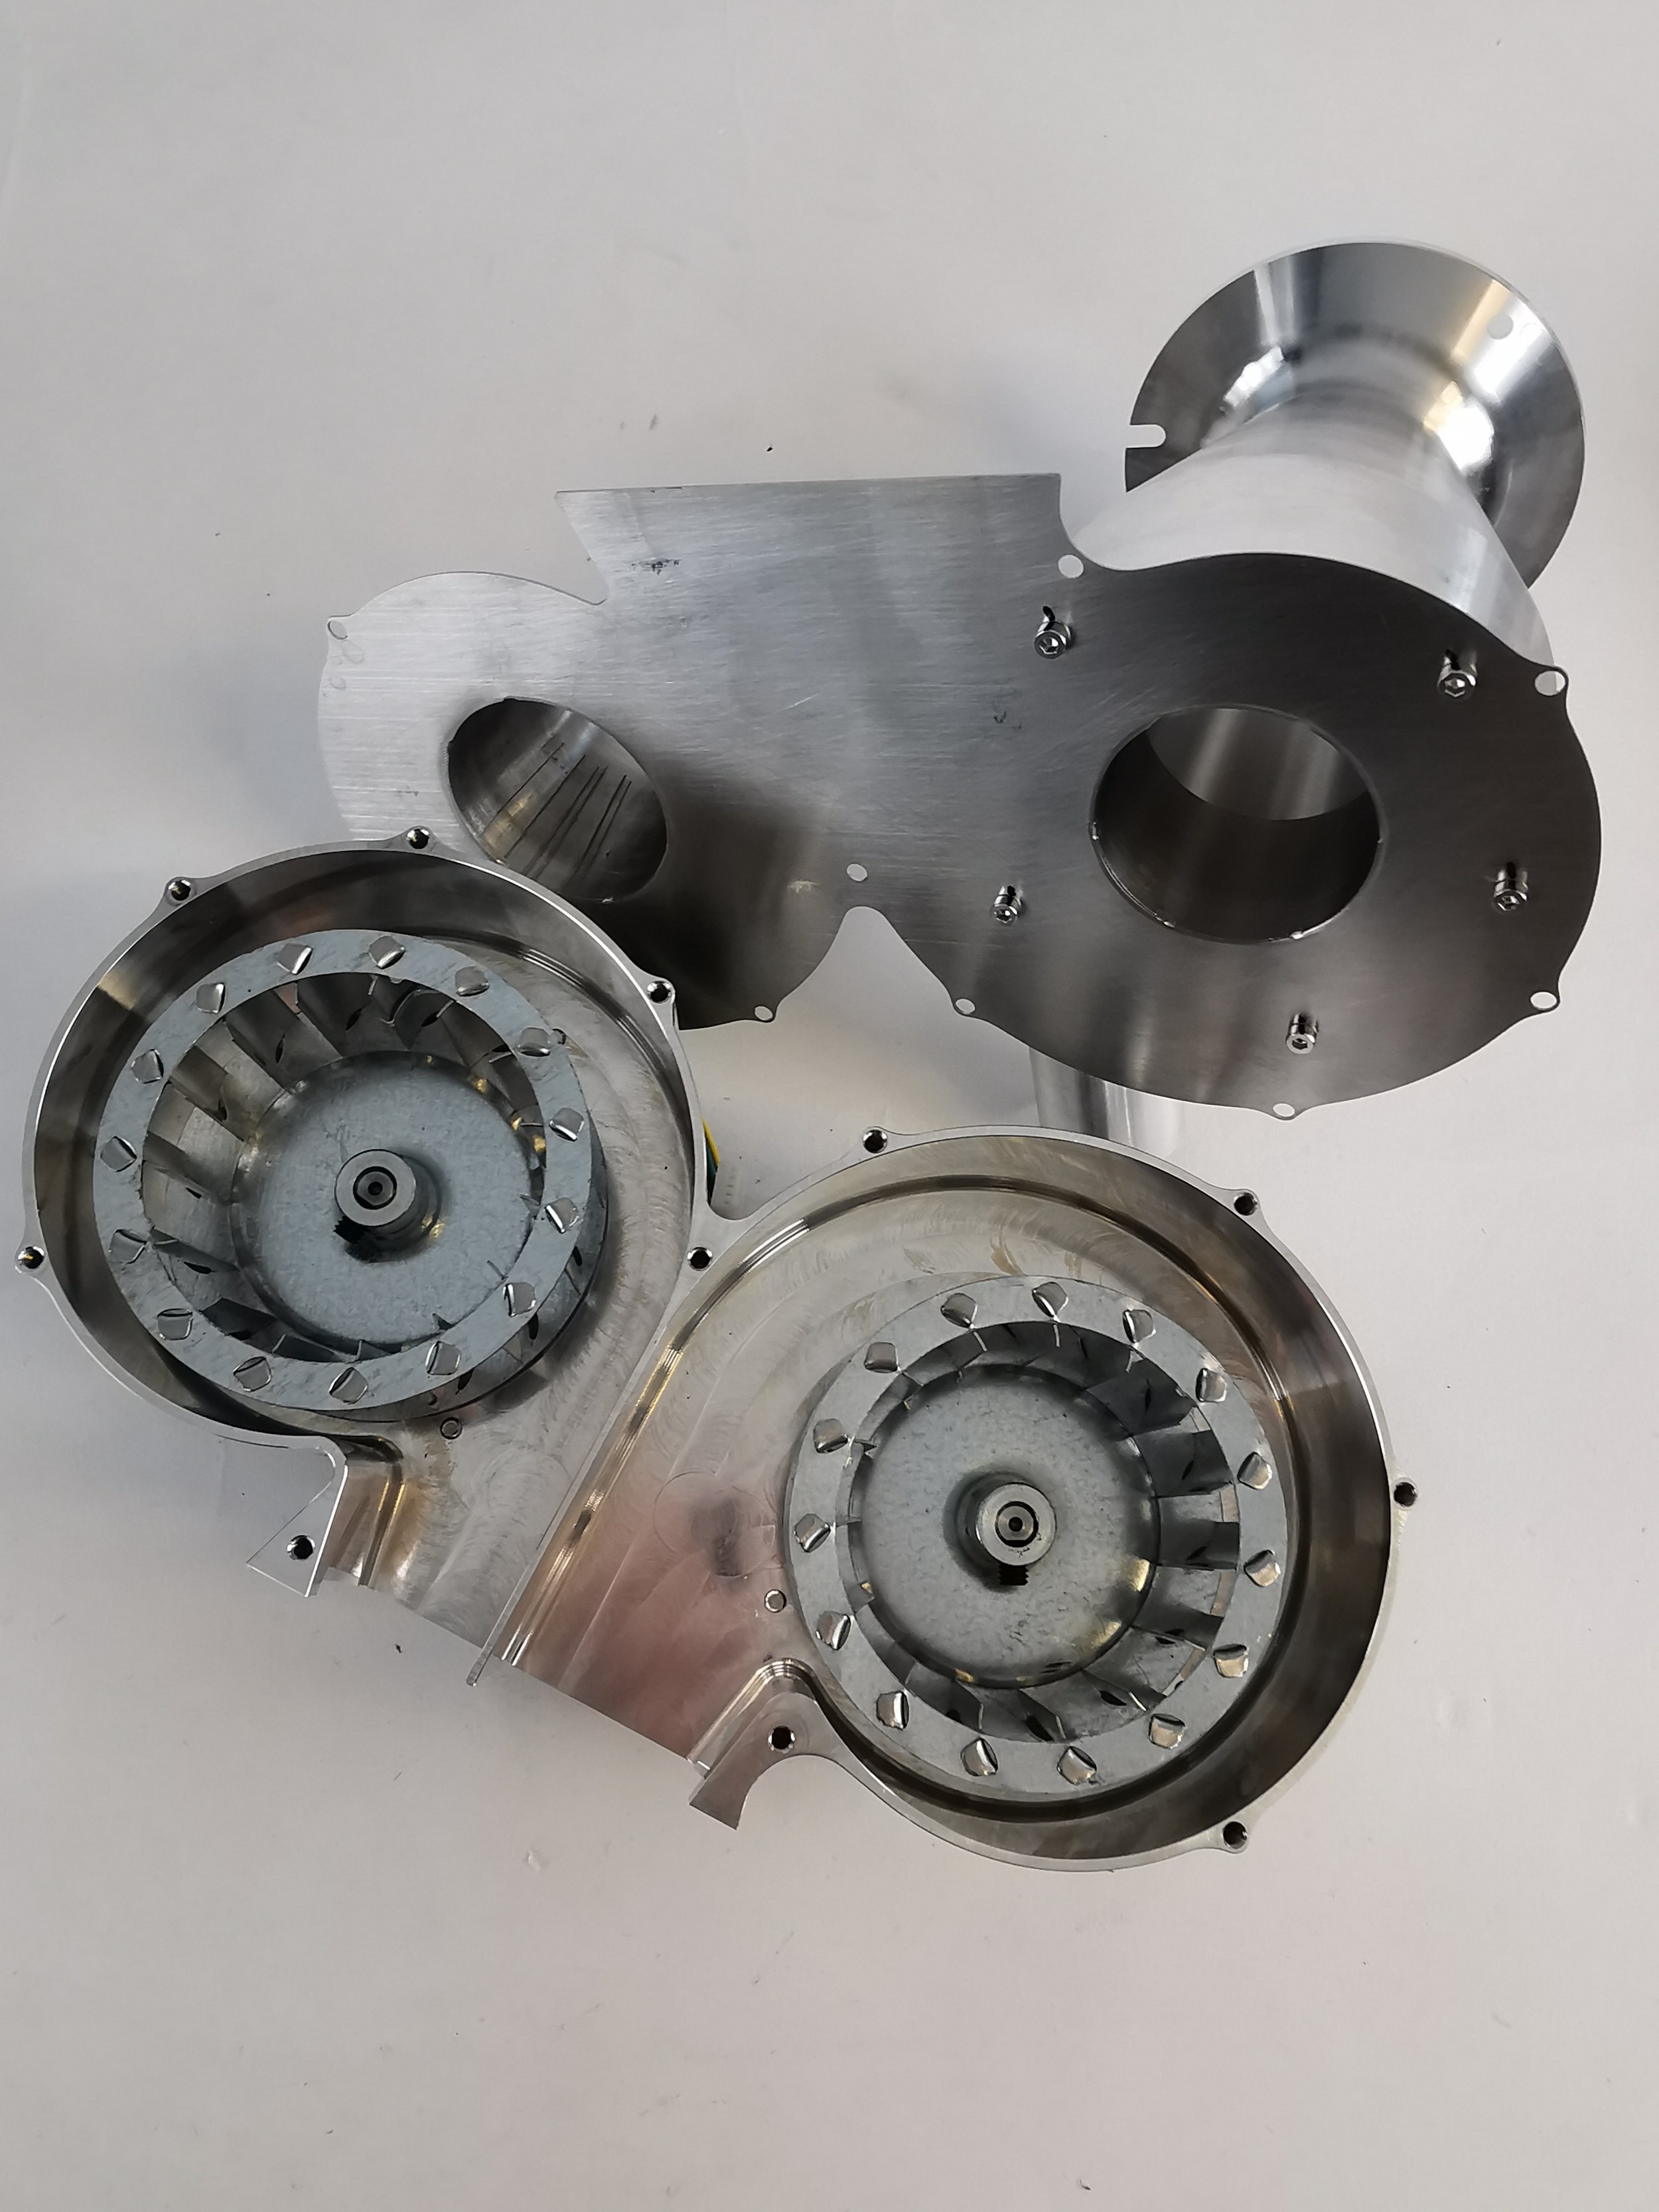
3. Separate the air intake housing from the cyclone separator to access the impellers.
NB: a flat screwdriver may need to be used to separate due to the build-up of chaff and oil.

4. Take an image/refer to the orientation and location of the left and right impellers before removing them. NB: the impellers are speci fic. They must be installed on the correct side for the chaff separator to work correctly.

5. Use a 4-millimeter hexagonal key to loosen the impeller on both the left- and right-hand sides.
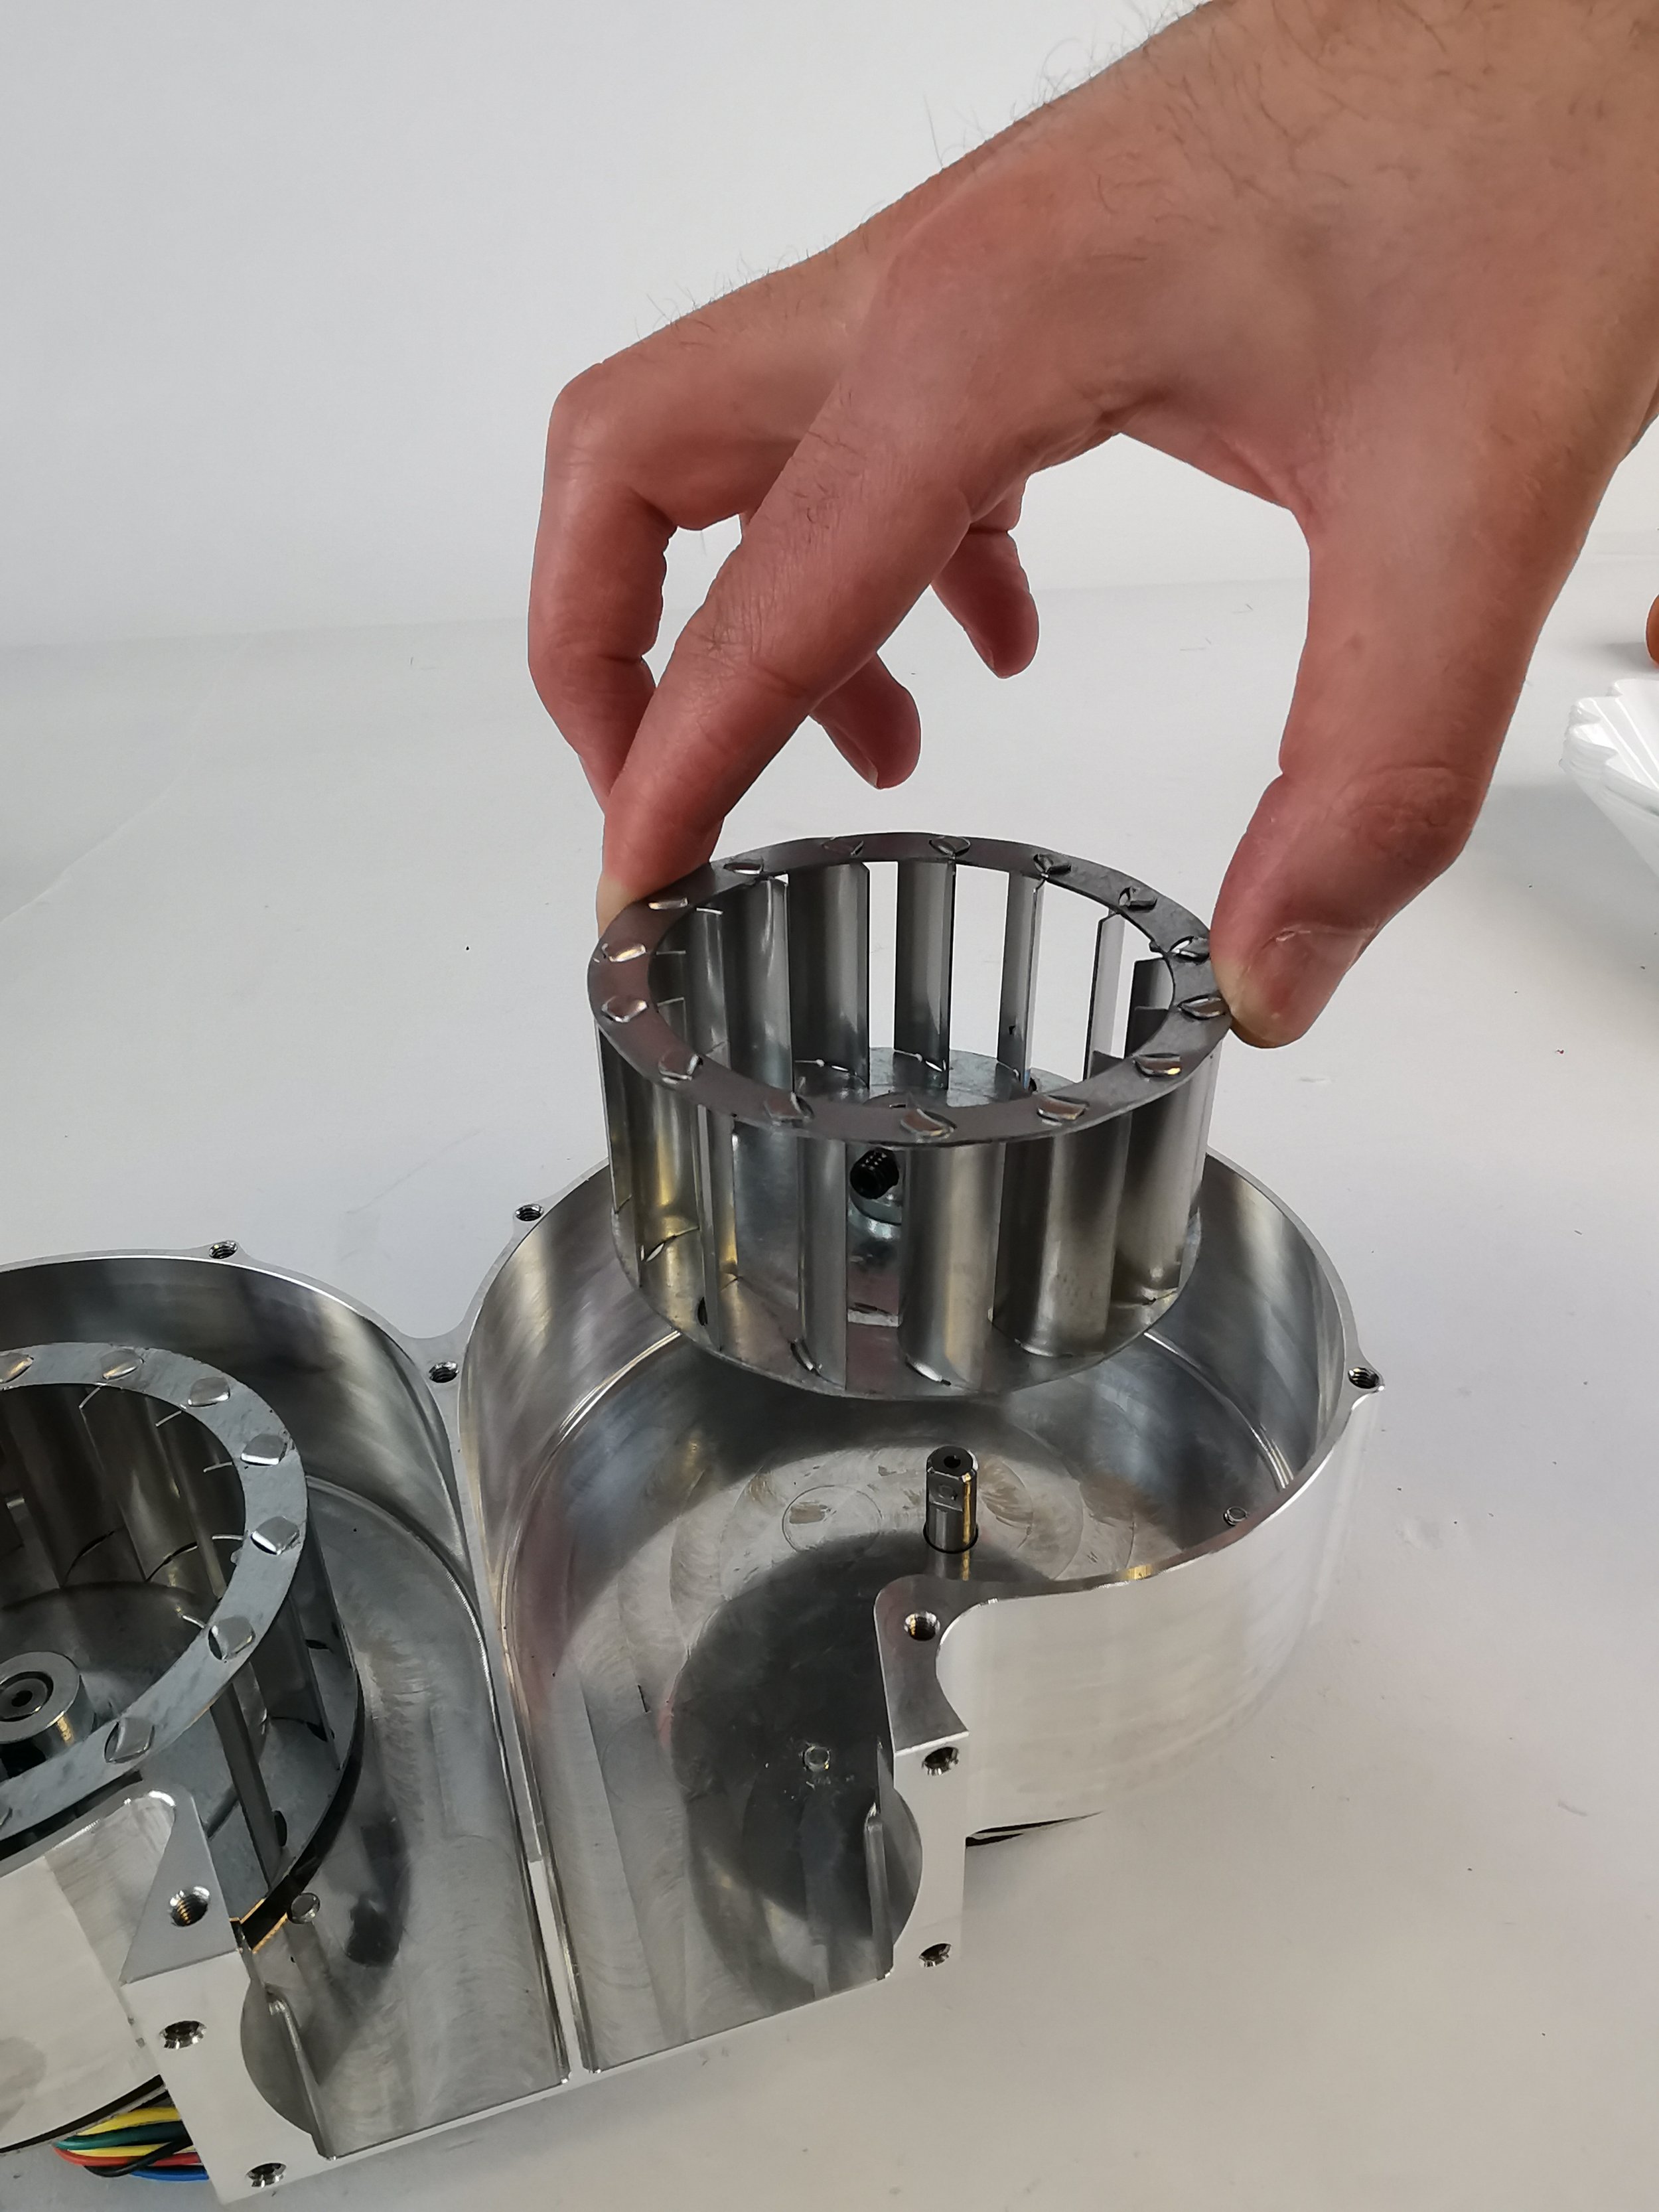
6. Lift the impellers from the motor shaft. Repeat for each side.

7. The impellers are now free for you to clean, or you can install new ones.
Optional: cleaning the impellers
At this point, your impellers can be cleaned if you wish to. We use a fat cleaner and let the impellers soak in this for a while. Afterward, we wash it off with soapy water. You can use a brush if you need to, but be careful not to remove the balancing clip from the impeller if it has one.
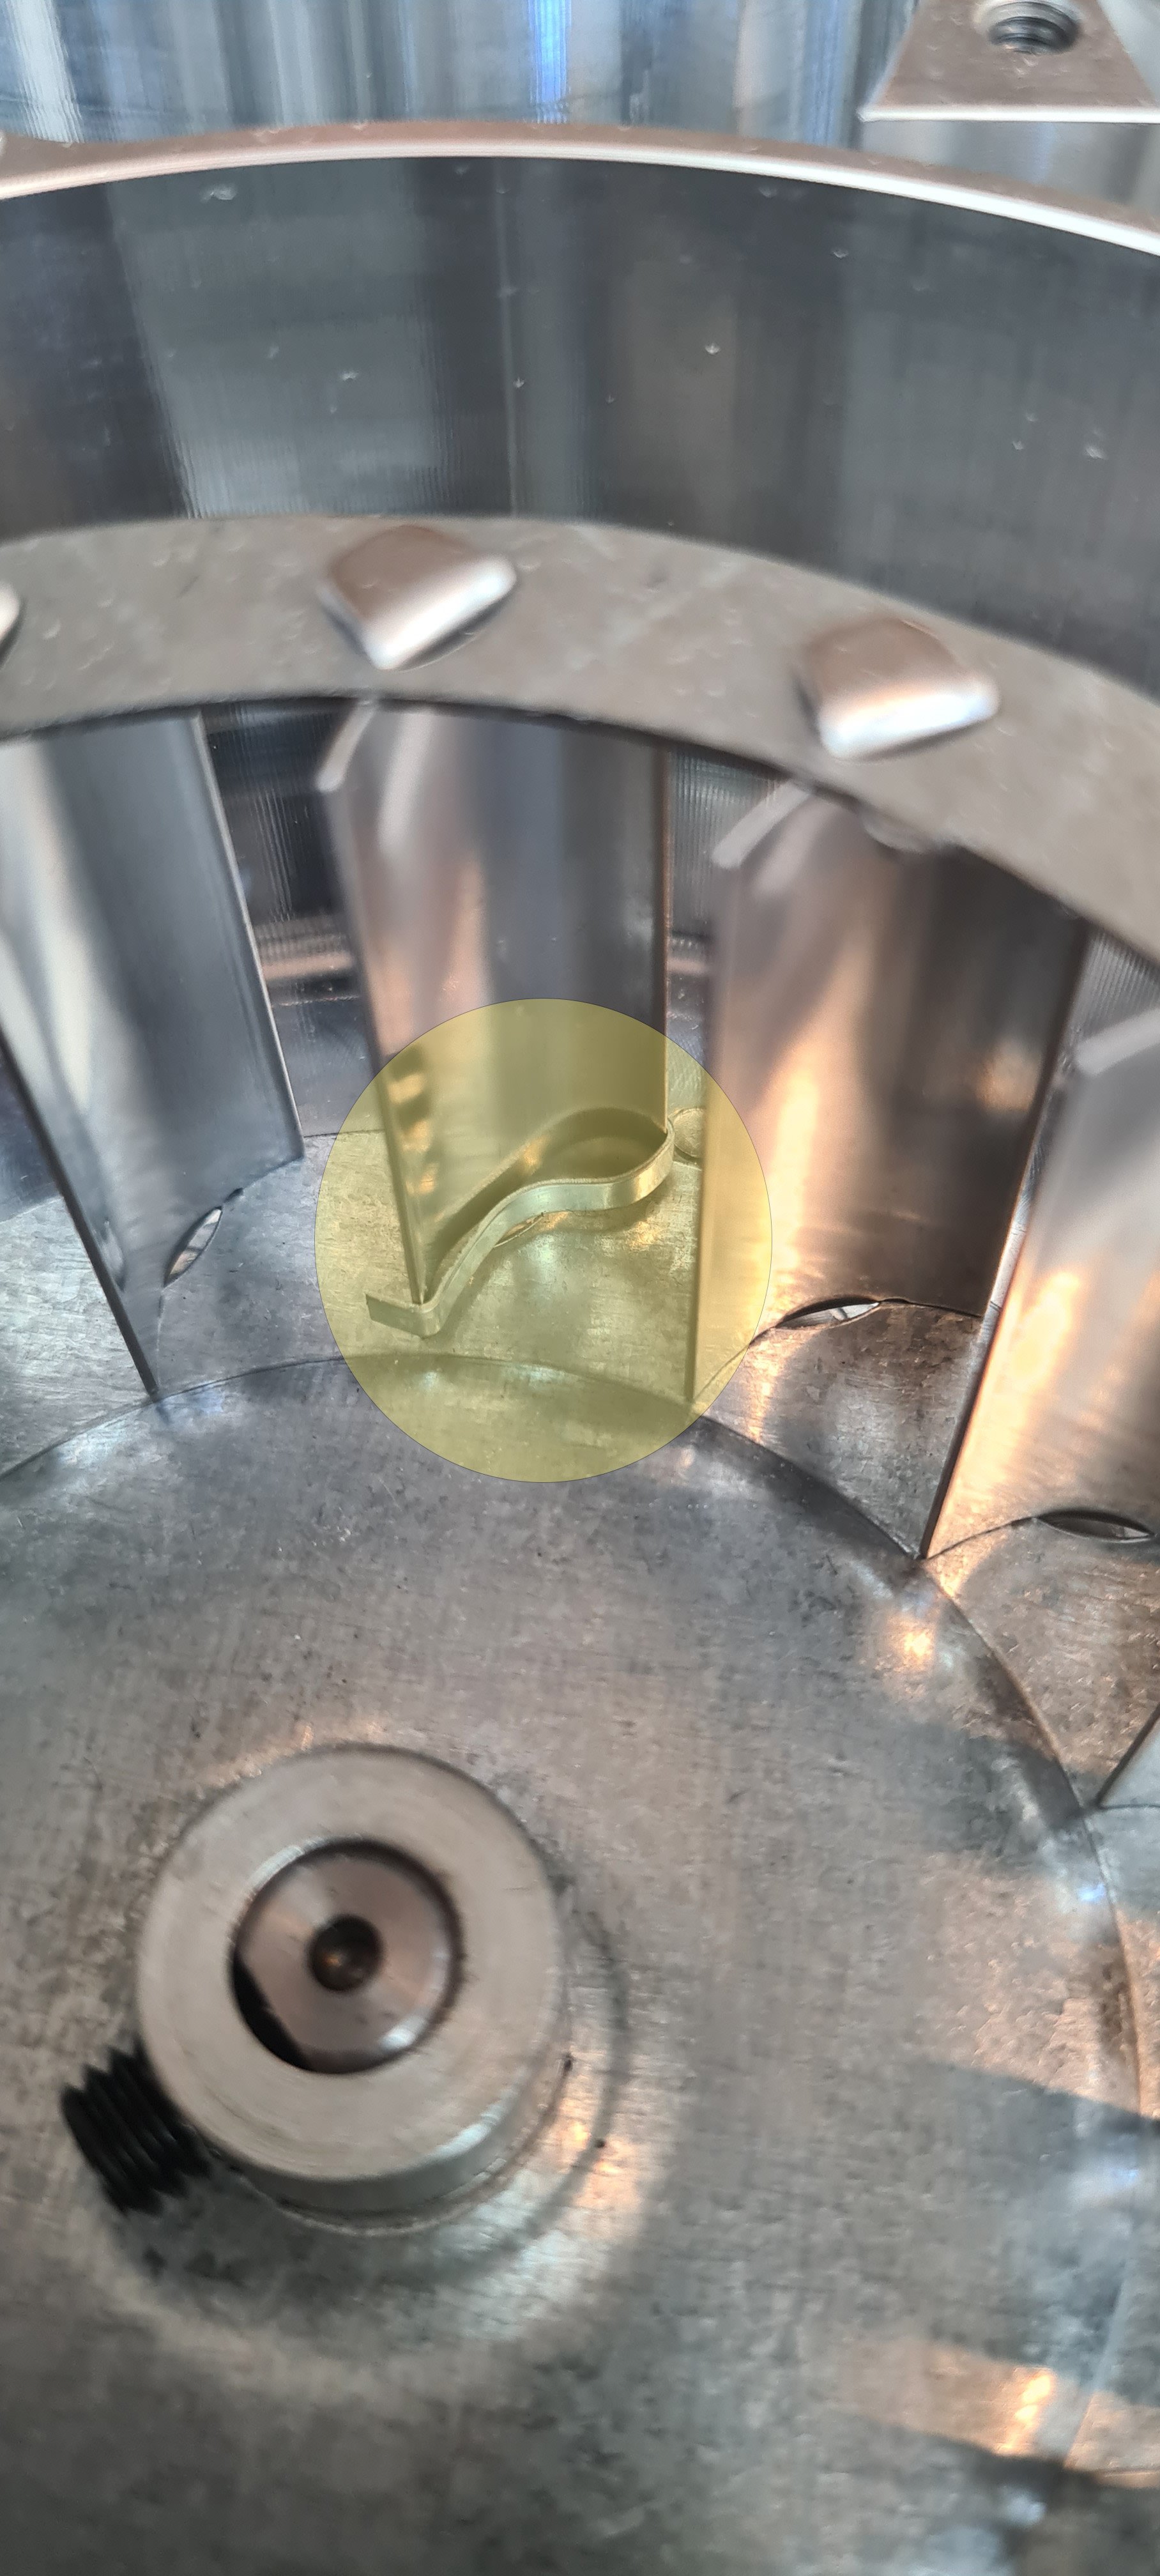
The balancing clip.
Installing the impellers
When installing the impellers, place a 1-millimeter-thick spacer on the face of the impeller housing. The spacer can be a piece of paper, cardboard, or something similar. It is just there to create a gap between the impellers and the impeller housing.
1. Install the impeller on the shaft on top of the spacer and tighten the grub with a 4-millimeter hexagonal key. Remove spacer. Repeat for the other side.

2. Place the cyclone separator on top of the air intake housing.

3. Screw all M4 x 6 cap head screws to secure both components together.

4. Locate the re-assembled chaff separator into the chaff drawer and align the exhaust with the rear.

5. Screw 3 M5 x 8 screws into the chaff drawer and tighten.

6. Screw 4 M4 x 6 cap head screws through the back panel into the chaff separator and tighten.

7. Screw 1 of M3 x 6 cap head screw through the mesh to attach the back panel from the chassis.
8. Reconnect the exhaust and bean cooler pipes.

9. Reconnect the exhaust and bean cooler pipes.
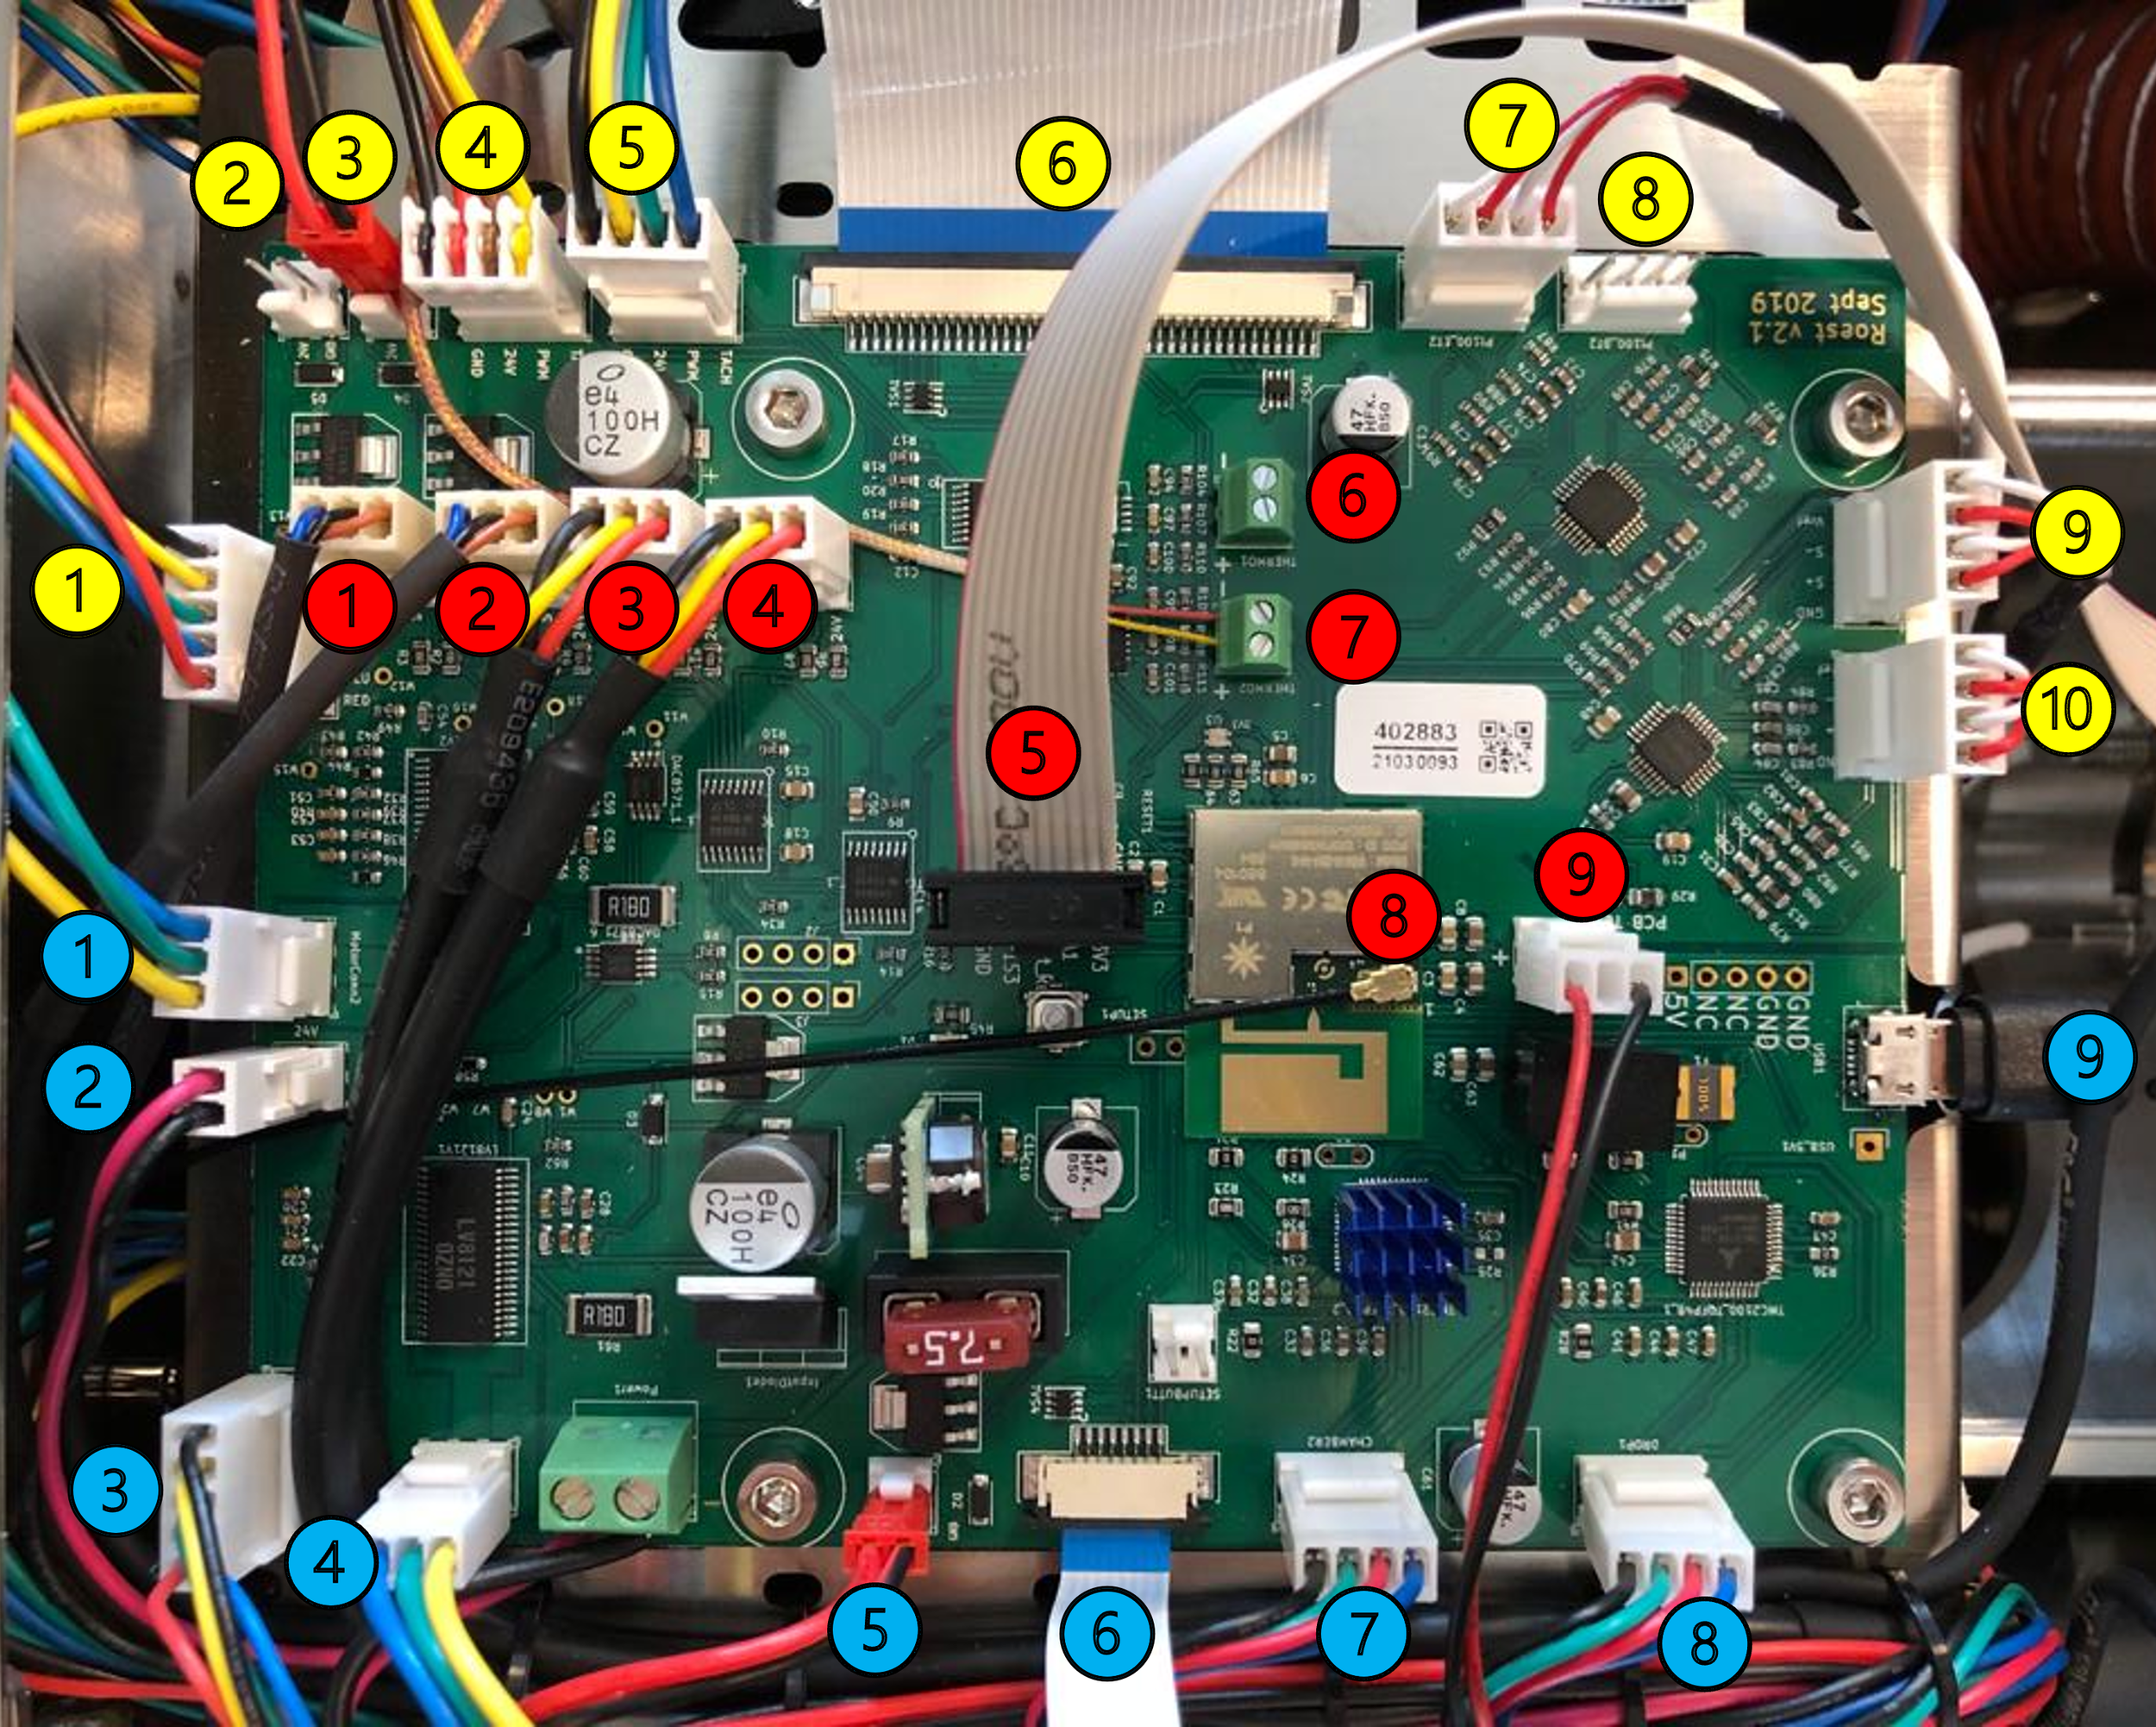
10. Connect fan connectors from PCB, marked 1, 3, and 4 in blue and 1 in yellow.
Reattach the side panels and top plate.